12.4.3. Add Content Experiments to Your Course#
This section provides instructions for adding content experiments to your course.
12.4.3.1. Before Adding Content Experiments#
Before you add content experiments to your course, ensure that you have completed the following tasks.
12.4.3.2. Add a Content Experiment in Studio#
You can add a content experiment in a unit or container page. In Studio, you create and view content for all groups in the content experiment in a container page for the experiment, as shown in Create Content for Groups in the Content Experiment.
When a learner views a unit with the content experiment, she has no indication there is a content experiment in the unit, and the content experiment display name is not shown. She sees only the content that you configure for the group she is assigned to. To the learner, the unit with the content experiment is no different than any other unit.
To configure a content experiment in Studio, you perform the following tasks.
After you configure a content experiment, you can change its group configuration. For more information, see Change the Group Configuration for a Content Experiment.
You can move a content experiment from its current location to a different location in the course outline. For information, see Reorganizing Components.
12.4.3.2.1. Create a Content Experiment#
Note
Do not create new content experiments by duplicating configured content experiments. Duplicating content experiments after you have configured them is not supported.
On the unit page, under Add New Component, select Advanced.
Select Content Experiment.
A new content experiment is added to the unit.
The content experiment includes a container for each group that is defined in the group configuration you selected. You create content for each experiment group as you do any other component. For more information, see Developing Course Components.
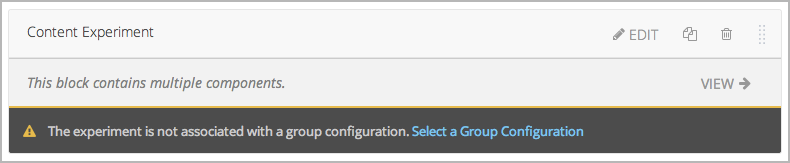
Select either Select a Group Configuration or Edit to open the content experiment component.
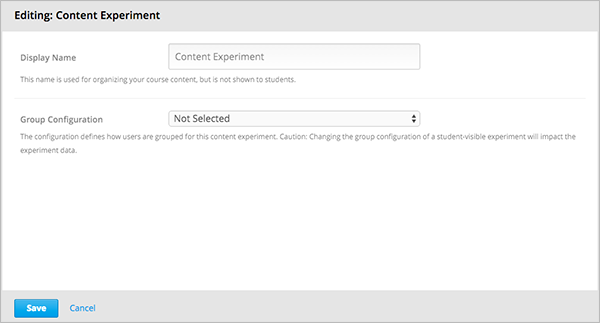
For Group Configuration, select a group configuration.
In the Display Name field, enter the name of the component. The display name is only used in Studio; learners do not see this value.
Select Save.
The content experiment is displayed as a component that contains other components. For more information, see Components that Contain Other Components.
You can now create content for the groups in the experiment.
12.4.3.2.2. Create Content for Groups in the Content Experiment#
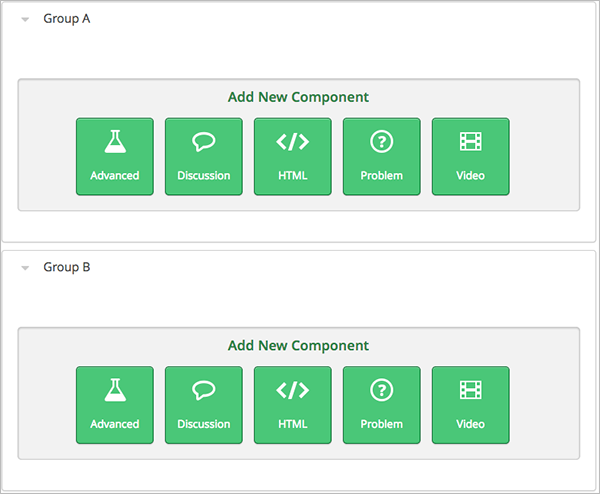
After you select a group configuration, in the content experiment component, select View.
The content experiment page that opens automatically includes a container for each group that is defined in the group configuration you selected. For example, if you select a group configuration that defines two groups, Group A and Group B, you see the following page.
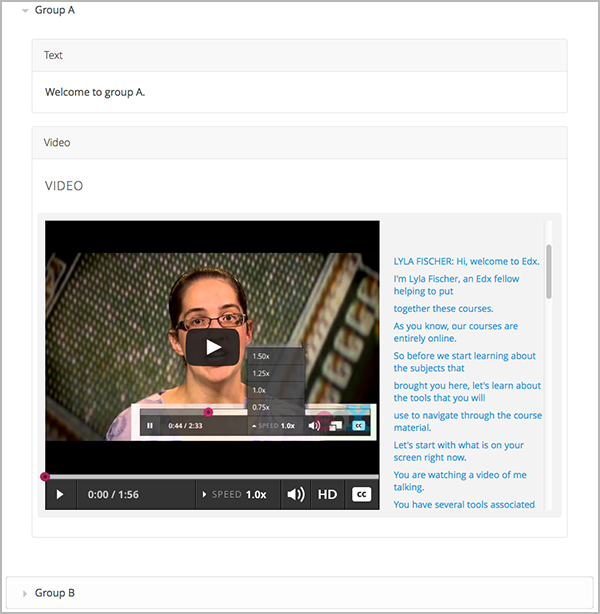
You add content for both groups as needed, just as you would add content to any container page. For more information, see Components that Contain Other Components.
For example, you can add a Text component and a video to Group A.
Note
It is valid, and can be useful, to have no content for a group in a content experiment. For example, if one group has a video and another group has no content, you can analyze the effect of the video on learner performance.
12.4.3.2.3. Change the Group Configuration for a Content Experiment#
You can change the group configuration for a content experiment. When you change the group configuration, you edit the content for any additional groups in the group configuration. You can use the components from the previous groups, as well as create new components.
Warning
Changing the group configuration of a learner-visible content experiment will affect the experiment data.
Open the unit that contains the content experiment.
In the content experiment component, select Edit.
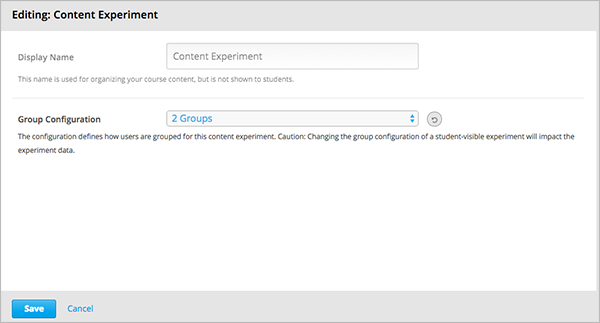
Select a different group configuration.
Select Save.
You must now add components to the new groups in the experiment. Select View to open the content experiment.
You see that groups for the new configuration are empty, and any components that you had added to groups in the previous configuration are now moved to a section called Inactive Groups.

Drag and drop components from the Inactive Groups section into the new groups. You can also create new components in the new groups.
12.4.3.3. Add a Content Experiment in OLX#
You work with multiple XML files to configure a content experiment. This section steps through the files involved in a content experiment that shows different content to two different groups of learners.
12.4.3.3.1. Define the Content Experiment in the Sequential File#
You reference a content experiment in the file for the subsection, or
sequential, in the sequential directory. For example:
...
<vertical url_name="name for the unit that contains the A/B test" display_name="A/B Test Unit">
    <split_test url_name="name of A/B test file in the split_test folder"/>
</vertical>
.....
The <split_test> element’s url_name value references the name of the
content experiment file in the split_test directory.
Caution
You can only define a content experiment in a unit, or vertical, in which different collections of components are associated with different experiment groups. You cannot define a content experiment at a subsection (sequential) or section (chapter) level and have different units or subsections associated with different groups.
12.4.3.3.2. Define the Experiment Content in the Split Test File#
After you define the content experiment in the sequential file, you define the
course content you want to test in the file in the split_test directory.
This is the file referenced in the <split_test> element in the sequential
file, as shown above.
In the content experiment file, you add elements for the experiment content.
For this example, you add two <vertical> elements to compare the two
different sets of content.
<split_test url_name="AB_Test.xml" display_name="A/B Test" user_partition_id="0"
            group_id_to_child='{"0": "i4x://path-to-course/vertical/group_a",
                                "1": "i4x://path-to-course/vertical/group_b"}'>
    <vertical url_name="group_a" display_name="Group A">
       <html>Welcome to group A.</html>
       <video url_name="group_a_video"/>
    </vertical>
    <vertical url_name="group_b" display_name="Group B">
        <html>Welcome to group B.</html>
        <problem display_name="Checkboxes">
            <p>A checkboxes problem presents checkbox buttons for learner input.
               Learners can select more than one option presented.</p>
            <choiceresponse>
                <checkboxgroup label="Select the answer that matches">
                    <choice correct="true">correct</choice>
                    <choice correct="false">incorrect</choice>
                    <choice correct="true">correct</choice>
                </checkboxgroup>
            </choiceresponse>
        </problem>
    </vertical>
</split_test>
In this example:
The
user_partition_idvalue references the ID of the experiment defined in thepolicy.jsonfile.The
group_id_to_childvalue references the IDs of the groups defined in thepolicy.jsonfile and maps the group IDs to specific content.For example, the value for group
0,i4x://path-to- course/vertical/group_a, maps to the<vertical>element with theurl_nameequal togroup_a. Therefore, learners in group 0 see the content in that vertical.
For information about the policy.json file, see Set Up Group Configuration for OLX Courses.