13.3. Creating Proctored Exams#
To create a proctored exam, you modify the course proctored exam settings in Studio to enable proctored exams, and then you modify the settings of a subsection to specify that the subsection is a proctored exam.
13.3.1. Enable Proctored Exams#
To enable proctored exams in your course, follow these steps.
In Studio, select Settings, then select Proctored Exam Settings.
Locate the Enable Proctored Exams policy key. The default for this field is to be unchecked, meaning that proctored exams are not enabled.
Check the setting to enable proctored exams.
Select Submit. You can now create proctored exams in your course.
After you enable this setting for your course, you can create a proctored exam or a practice proctored exam.
13.3.2. Create a Proctored Exam or Practice Proctored Exam#
To create a proctored exam or a practice proctored exam, follow these steps.
Add and develop a subsection as you would any other subsection.
For a practice proctored exam, edX recommends that you include only a few problems in this subsection. Or, you could add a unit with a text component that provides information about the exam.
Select the Configure icon for the subsection.
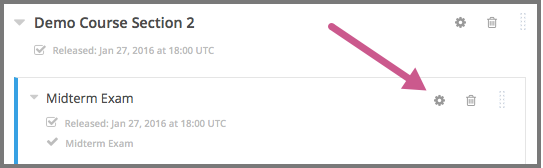
The Settings dialog box opens to the Basic tab.
In the Grading section, set the assignment type and due date for the subsection.
Note
For a practice proctored exam, leave the assignment type as Not Graded.
Select the Advanced tab, and then locate the Set as a Special Exam section.
Select the proctored exam type.
For a proctored exam, select Proctored.
For a practice proctored exam, select Practice Proctored.
In the Time Allotted field, enter the length of time that you want to allow for the exam as HH:MM, where HH is hours and MM is minutes.
(optional) For a proctored exam, in the Review Rules field, enter any additions or exceptions to the default rules for proctored exams. For more information, see Specify Exam Rules and Exceptions.
Select Save.
13.3.3. Specify Exam Rules and Exceptions#
The rules for proctoring exams vary according to the proctoring service that you or your organization has chosen. However, the online proctoring rules that this guide lists are common to many proctoring services.
Note
The course grace period setting does not apply to proctored exams. For more information about the grace period setting, see Set the Grace Period.
You can also provide custom rules for a particular exam. For example, you might allow learners to use a calculator, or to have one sheet of blank paper. These rules are visible to reviewers and learners at the start of each proctoring exam.
To specify custom proctored exam rules, follow these steps.
In Studio, open your course outline and select the subsection for the exam.
Select the Configure icon to open the Settings dialog box.
Select the Advanced tab, and then locate the Set as a Special Exam section.
In the Review Rules field, enter any additional rules. For example, you might enter the following rule.
Allow one blank sheet of paper and a pencil or pen. Allow a hand-held
calculator on the desk.
Select Save.
13.3.4. Allow Opting Out of Proctored Exams#
When a proctored exam opens, by default, learners are required to take the exam as a proctored exam. If you want to allow learners to take proctored exams without proctoring, you can change a setting on the Proctored Exam Settings page in Studio.
Note
If a learner opts to take an exam without proctoring, the exam will not be timed either. In effect, learners who opt out of proctoring will have unlimited time to complete the exam and could return to problem sets at any time. You can reduce the ability to view the exam by selecting a due date for the exam.
To enable the option for learners to opt out of proctored exams for a course, follow these steps.
In Studio, select Settings, then select Proctored Exam Settings.
Locate the Allow Opting Out of Proctored Exams policy key. The default value is
No, which requires Verified and Master’s learners to take proctored exams with proctoring.Change the value of the setting to
Yes.Select Submit.
13.3.5. Check Proctoring Results#
For information about how to obtain and interpret proctored exam results, contact your proctoring software provider.